After reshooting, it was time to start editing and cutting the clips together to actually form the title sequence. Taylor was our main editor and she started by going through all the footage we had and selecting the best cuts for each scene. Then she took the scenes that we wanted into iMovie and began to place them in the order that we wanted. This was fairly simple as we had our handy storyboard where we planned our plot out. It was a bit of a tedious process having to export every single video clip onto her computer to edit it, but she is great and was able to get it done well.

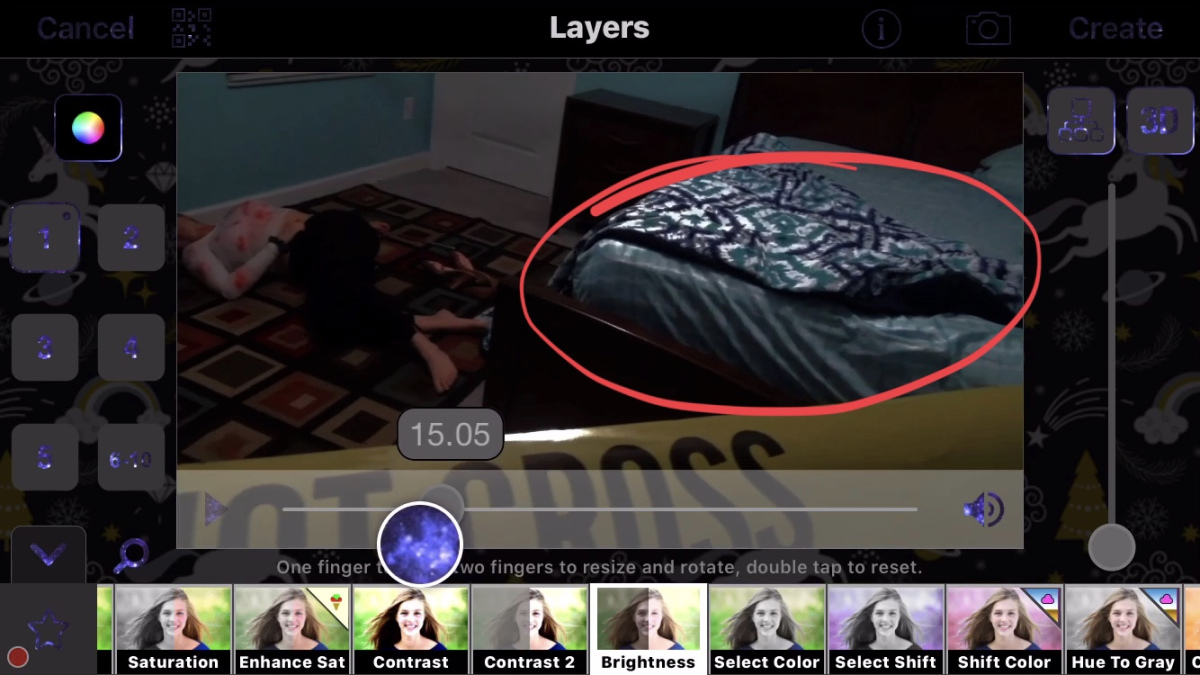
The next part of editing was color correcting and adding filters. In mystery and crime movies they all typically will have darker filters and dimmer lighting to establish the scary mood. Unfortunately, the lighting of the clips that we had were extremely bright because of the ceiling fan that only had one on and off switch. So the high-key lighting that we had obviously wouldn’t work for our title sequence. When trying to find filters on iMovie, they were not turning out as planned and the look was not how we envisioned it to be. Thankfully, Taylor already has an interest in editing prior to this project and had an app called Video Star downloaded onto her phone. She paid money for this, so in this aspect we had more of an advantage than others on this project, but it definitely worked in our favor. Using this app, Taylor was able to have a wider variety of options about the filters and it made the scenes look a lot scarier and darker. Taylor showed me what she had so far, and it looked to me that the bed was a little too overexposed in the crime scene parts, so she lowered the exposure and edited a black screen on top with 50% transparency to make it achieve the darker look.
The office scenes didn’t’t require too much color correcting or filters, as it was meant to be taken place in the daytime in an office. So no changes to the lighting was really necessary as our footage already covered our criteria for this.